Basic IDE Tools : Tools and utilities for Basic IDE
| Vers. | Read |
|---|---|
|
Ayuda en línea Vers. 1.2, 1.3 - Español
|
|
Ayuda en línea Vers. 1.0.1 - Español |
Content
What is Basic IDE Tools
| Basic IDE Tools is an extension for Apache OpenOffice and OpenOffice.org, developed by the open-office.es team, which adds a new toolbar to OpenOffice Basic editor (IDE).
Includes several buttons that add new features and options that make working with macros and applications easier for the programmer when writing Basic code. The extension is released under the GNU GPLv3 license. Before using the extension, please read the terms of the license. The extension can be downloaded from the official website of Apache OpenOffice extensions: Basic IDE Tools |
How to install Basic IDE Tools
 |
Basic IDE Tools is installed like any other extension of OpenOffice. If after requesting the extension download does not start automatically the extension manager, locate the installation file on your hard drive (BasicIDETools.1.0.1.zip or BasicIDETools.1.0.1.oxt) and double click itself, or from the context menu, select Open With ... OpenOffice.org.
After requesting permission to install, and accept the license terms, the extension will be integrated in OpenOffice. 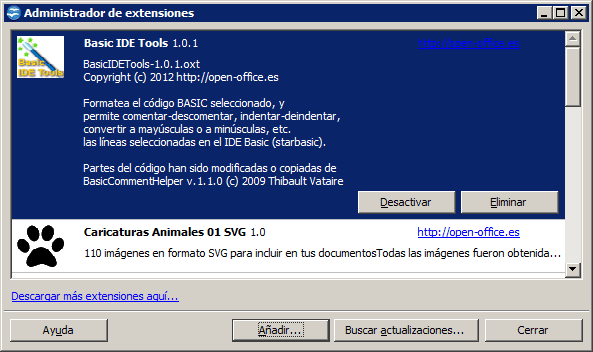 As for any extension, will have to close all open OpenOffice applications, including Quick Start (in spanish) so; after restarting OpenOffice, it is activated correctly. |
The Basic IDE Tools toolbar
The Basic IDE Tools toolbar presents eleven buttons that add new options to OpenOffice Basic editor, and a About… button.

The functions of the buttons are as follows: |
Comment, uncomment or toggle comments
 |
These three buttons, called Add comments, Remove comments and Toggle Comments allow comments, uncomment or alternate comments on selected lines of code.
To apply these options:
Toggle comments add comments to the lines that do not have, and remove comments on the lines that do have. The following video shows the operation of these three options:
|
Indent, de-indent or re-indent all
 |
These three buttons, called Indentation increase, Indentation decrease and Re-indent All, allow indent, de-indent or re-indent selected lines of the code.
To apply these options:
Re-indent option applies automatically indentation to all code selected by examining the code. The following video shows the operation of these buttons:
Rules that follow the option Re-indentingTo apply Re-indenting follow these rules:
|
Format code
 |
This button allows you to format the code of the selected lines, applying uniform criteria that improve the readability and visual appearance of the code. Used in conjunction with the option Re-indenting, allows to get a code with a clear and structured look.
To apply this option:
Actions that the Basic code formatter can doRunning this option, can be applied the following actions on the selected code:
Formatting takes time, depending on the number of selected lines and the length itself. Do not perform any action while applying the code formatting, as clicking on the code, or select another module, or any other action in the IDE; not copy, cut and / or paste into other applications. Wait until then process finishes. The following video shows the operation of this button:
Keywords recognizedSee at the bottom of this page Keywords recognized by the formatter.
Dose not format some variables, constants or function calls or subroutinesYou may notice that the code does not have replaced the names of variables, constants, functions or subroutines with the format they have been declared. The reasons are:
In future versions we are hoping to solve these three problems. |
Find Previous and Find Next
 |
These two buttons called Find Next and Find Previous let you search the selected text in the current module and in all then library modules.
To search the selected text:
The following video shows the operation of these buttons:
Find and ReplaceTo execute the Find and Replace process, follow this procedure:
|
Convert to uppercase or lowercase
 |
These two buttons called Uppercase and Lowercase allow to convert all uppercase or all lowercase, the selected code.
To apply these options:
The following video shows the operation of these buttons:
|
ASCII codes table
 |
Presents a table of ASCII codes and corresponding characters.
By selecting this option from the toolbar to display a dialog with more than 2000 ASCII codes 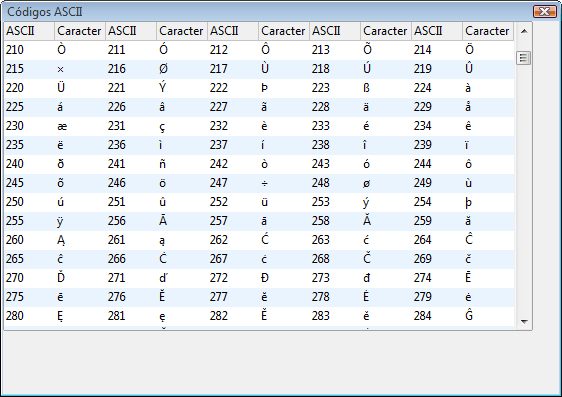 |
Code Assistant
 |
It has a wizard to write code.
By selecting this option from the toolbar to display a dialog that allows you to insert predefined blocks of code, including Function, Sub, conditional IF and Select, loops For, Do, While, several blocks UNO dispatcher, On Local Error, definition of Type, functions Array2String and String2Array, and all variations of MsgBox. 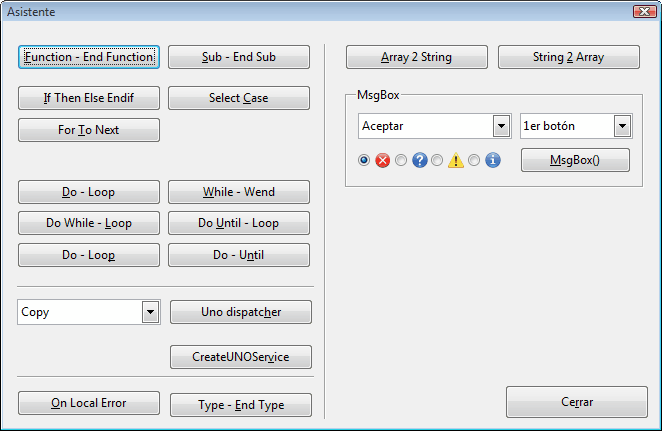 |
Inspector
 |
Enter code to call the object inspector.
After clicking on the toolbar button, the following dialog appears, requesting confirmation to insert the necessary code:  By accepting incorporates the following block of code in the current cursor position: BIT_Inspector_Explores( oObject, False) ' True => Exit to Calc Where should replace oObject by the object to be examined, and indicate True in the second argument if you want to get the output into a Calc sheet Examples of use of the inspector
BIT_Inspector_Explores ThisComponent
BIT_Inspector_Explores ThisComponent, true
dim oSheet as Object
oSheet = ThisComponent.getSheets(0)
BIT_Inspector_Explores oSheet
dim oDoc as Object, oSelection as Object, oModel as Object
oDoc = ThisComponent.CurrentController()
oModel = oDoc.Model
oSelection = oDoc.Selection

BIT_Inspector_Explores oDoc
BIT_Inspector_Explores oModel
BIT_Inspector_Explores oSelection
The result will be a dialog similar to that shown below: 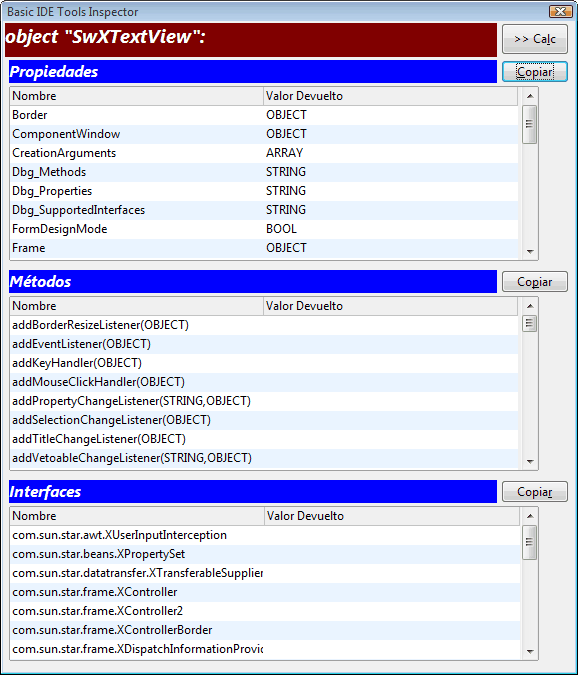
|
Online Search
 |
It has a wizard to get help on the Internet.
After clicking on the toolbar button, the following dialog will be presented, which will be automatically pasted the preselected search string: 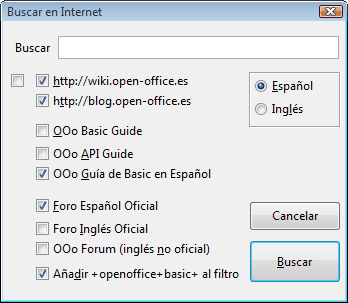 You can edit the text to search, and select the sites where search using the options available. After clicking on the Search button will open your default Internet browser with a Google search restricted to selected websites. |
 |
Activates a context menu in the IDE editor.
This pair of buttons allow you to switch a PopUp menu that appears when you right-click in the Basic IDE editor.
After clicking on the button 'Enable' of the toolbar shows this dialog, indicating PopUp menu is enabled. 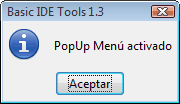 If necessary, select the text you want to copy, format, indent, etc ... After clicking on the selected text side, displays the following PopUp menu: 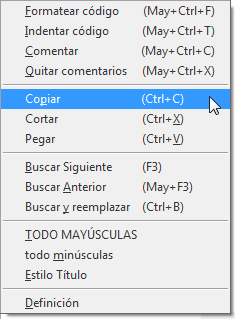 If you selected the call to a function or subroutine, clicking on the option Definition attempt to locate the code defining the same and if found, then display it on screen. The search is performed within the library that is being edited. After clicking on the button Disable of the toolbar shows this dialog, indicating that it has disabled the PopUp. 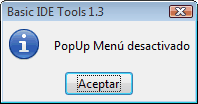 When you close the Basic IDE editor ends with the utility, so it needs to be reactivated every time you start the editor. |
Button About...
| |
Presents information about the Basic IDE Tools extension.
After pressing the button displays the following dialog: 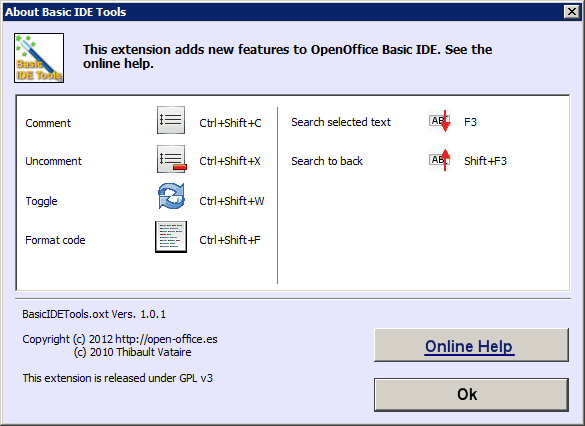 |
Undo changes
 |
You can use the Undo button on the Standard toolbar of the IDE, or the keyboard shortcut Ctrl + Z to undo the changes made to the selected code.
We observed that the IDE undo button usually fail when trying to undo several steps. This error is not due to Basic IDE Tools. In our trials, the first step to undo has always been made without error, and we consider not secure to undo more steps. |
Recommendations for the use of this extension
Creating a basic code can be the result of hours, days, months or even years of work. Therefore it is highly recommended that:
- Back up your code before using this software.
- Save the changes to your code always before using this software.
It has been done trials simulating errors. After saving the project, it has been added an option with a simulated error thath ruins the code. Then we closed the IDE editor without saving changes, after reloading the project, we recovered without problems the saved code before applying the option.
It is therefore recommended that you always save the changes before applying a command available in the extension. In the case of noticing that after applying a command for extension in its code has been wasted, you can follow the same procedure as described in the previous paragraph to attempt to retrieve the previously stored code.
Software that is the extension and any associated components are distributed in the hope that it will be useful, AS IS and WITHOUT ANY GUARANTEE of its performance, fitness for a particular purpose, or of the results obtained. If you use this extension, is at your own risk. We are not responsible for any damage or loss that may lead to the use of this software. By installing and / or using this software implies your acceptance of the terms of the GNU GPLv3 license that must enclose the software. Please refer to the GNU General Public License for more detailed information.
Keywords recognized by the formatter
The words recognized by the formatter are presented in the table below these lines. The formatter will replace any occurrence of these words in the code written by the same word with the same look as that presented in the table. They are presented in alphabetical order from left to right in each row, and up and down columns.
| Abs | AND | As | Asc | Atn |
| Base | Beep | Boolean | ByRef | Byte |
| ByVal | Call | Case | cBool | cByte |
| cCur | cDate | cDateFromISO | cDateToISO | cDbl |
| ChDir | ChDrive | Choose | Chr | cInt |
| cLng | Close | Compatible | Const | ConvertFromURL |
| ConvertToURL | Cos | CreateUNODialog | CreateUNOListener | CreateUNOService |
| CreateUNOStruct | CreateUNOValue | cSng | cStr | CurDir |
| Currency | cVar | Date | DateSerial | DateValue |
| Day | DeclareSet | DefBool | DefCur | DefDate |
| DefDbl | DefInt | DefLng | DefObj | DefSng |
| DefStr | DefVar | Dim | Dir | Do |
| Double | Each | Else | ElseIf | End |
| EndIf | Environ | Eof | Eqv | Erl |
| Err | Error | Exit | Exp | Explicit |
| False | FileAttr | FileCopy | FileDateTime | FileExists |
| FileLen | Fix | Float | For | Format |
| FreeFile | FreeLibrary | Function | Get | GetAttr |
| GetGUIType | GetProcessServiceManager | GetSolarVersion | GetSystemTicks | Global |
| GlobalScope | GoSub | GoTo | Hex | Hour |
| If | IIf | Imp | In | Input |
| InputBox | InStr | Int | Integer | Is |
| IsMissing | IsNull | It | Join | Kill |
| LBound | LCase | Left | Len | Line |
| Loc | Local | Lof | Log | Long |
| Loop | LSet | LTrim | Mid | Minute |
| MkDir | Mod | Month | MsgBox | Name |
| New | Next | Not | Now | Object |
| Oct | On | Open | Option | Optional |
| OR | ParamArray | Preserve | Private | |
| Public | Put | QbColor | Randomize | ReDim |
| Rem | Reset | Resume | Return | RGB |
| Right | RmDir | Rnd | RSet | RTrim |
| Second | Seek | Select | SetAttr | Sgn |
| Shell | Sin | Single | Space | Split |
| Sqr | Static | Step | Stop | Str |
| StrComp | String | Sub | Switch | Tan |
| Then | ThisComponent | Time | Timer | TimeSerial |
| TimeValue | To | Trim | True | TwipsPerPixelX |
| TwipsPerPixelY | Type | UBound | UCase | Until |
| Val | Variant | Wait | Weekday | Wend |
| While | With | XOR | Year | ' |
Translated by Diana Roldán García. Thanks

